Thank you Tom for such an excellent and educational article. I have seen too many friends and family members spending thousands of dollars on a TV but end up using over saturated picture settings or vivid modes because the colors pop up drastically. Now, I can forward/share this article to them so that they can make an educated decision.
- REVIEWS
Displays Electronics 
Speakers Sources Other Gear Software - HOW TO
How To Buy How To Use Tech 101
DIY "Calibration"
If you find yourself experiencing a flashback on reading this blog, you're not alone. Last summer I wrote a similar piece. But there's always new ground to cover, particularly on the subject of TV setup and calibration. Some of the material here is similar to that in the prior blog, but in other ways the results are different.
An accurate calibration requires that the calibrator be trained, have access to specialized test gear and PC calibration software (of the latter, Calman from Portrait Displays is the best known and most widely used). Neither the required equipment nor the training and software required by a professional calibrator comes cheap; it can easily run into thousands of dollars. To cover these costs, there must be enough customers to spread out the expenses with enough left over to earn a reasonable profit. So calibrations can be pricey. Don't quote me on this (the cost could vary widely in just the U.S.A. and I have no clue as to what might be charged elsewhere on the planet), but I wouldn't be shocked to see a tab of $300-$500, with the upper end including separate adjustments for both standard SDR and high dynamic range (HDR).
The need for an accurate calibration is most acute in places such as Hollywood film and television broadcast suites, where program material is being finalized for delivery to the consumer. The finished product (DVD, Blu-ray, 4K HDR Blu-ray, streamed or broadcast programming) needs to be made to such a tight standard that the calibration of the mastering monitors used might even be re-checked more than once during a given gig to insure that the result meets the expectations of the program producer and/or director (one or both of whom might even be on hand to monitor the ongoing process).
The lighting in such a mastering control room will also be set to a generally low (but not totally dark) standard. The mastering engineer needs enough light to work with but not enough to skew the visible result. Anything else that might affect the final mastered product must also be carefully controlled, including room's (hopefully) dark, non-reflective walls.
The Trained Calibrator
A home calibration by a trained calibrator is very different. Should the calibrator totally darken your room, even if that's possible? Most home calibrations are likely done during the day, and few consumers have the ability to block all of the sunlight entering their rooms. But the calibration can perhaps duplicate the typical conditions the customer will normally use while eliminating light falling directly on the screen. Some (not all) measurement meters also come with soft shields that fit over their front lens barrel to allow the meter to be (carefully) positioned over the center of the screen, thus (hopefully) blocking out extraneous light. But whether to calibrate with typical room lighting in the customer's situation, or darkening the room as much as possible, will be an on-site decision of the calibrator and his or her customer. In my calibrations, however, I generally have no choice; I can't duplicate specific lighting conditions for an unknown reader, so I darken the room as much as possible. In my location that can mean starting no earlier than 8 p.m. in the summer!
While a professional calibration remains the best route to fully dialed-in TV (or at least as dialed-in as the set is capable of), it may not be practical for everyone. You may live in an area where no calibrator is available. Best Buy once did calibrations, but they no longer do so. Smaller but high-end AV stores might offer this service, but likely only in larger cities where enough customers are available to justify keeping the required equipment and skilled calibrators on hand.
But there are DIY alternatives. They may not result in as precise a setup, but with care and a little experience the results can be highly satisfying. It also helps that at least some brands of TVs appear to be arriving out of the factory these days offering more accurate out-of-the-box results as long as you choose the best user settings (which are unlikely to be the as-delivered settings).
The DIY Alternative
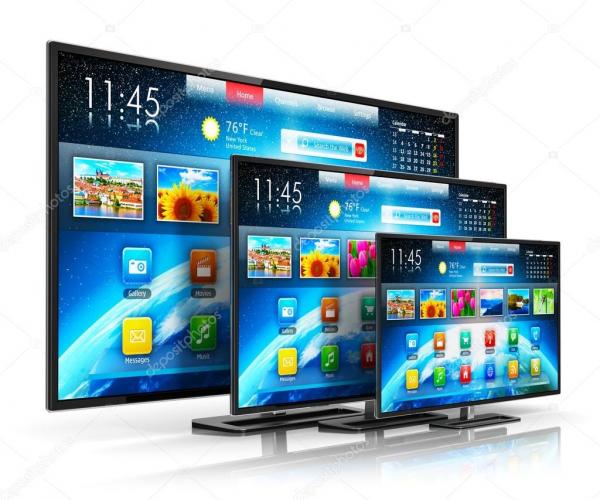
If a TV-challenged friend appears amenable to taking advice and assistance from you, his S&V-reading expert, what can you recommend? First, go into the menus and review the so-called Picture Modes. More often than not a new TV will be in a setting called "Standard" or something similar. Another less likely default (but tempting to the uninitiated) might be "Vivid." Stay away from these!
But some TV companies now appear to be making an effort to offer Picture Modes that are closer to correct than before. These Modes might include names such as Movie, Cinema, Film, Filmmaker, ISF Day and ISF Night (the ISF, or Imaging Science Foundation, is an organization that, to my knowledge, trains the most pro calibrators, particularly those in the U.S.A.). Judge which of those modes look best to you, but try to ignore ISF Day. It will likely be brighter than the others, which can be erroneous as the eye is always attracted to the shiniest object.
Once you select one of those optional Picture Modes, look for the Motion settings. They'll likely be turned on. For now, switch them all off. With movies, leaving motion compensation on will almost invariably produce the "Soap-Opera Effect," making all films look like they were shot on video with the characters gliding around like they're on ice skates. Some viewers will be impressed by this feature. But it isn't the way most directors expect their films to look, unless they (very rarely) shoot them that way. But it's your TV; if you decide later that you like motion compensation in some form, the Video Police won't be busting in your front door to confiscate your remote!
The main detail adjustments that can't be done accurately without those pricey test tools (and the skill to use them) is achieving the most accurate color. Getting the colors spot-on can't be done precisely by eye. But there are two colors, flesh tones and green foliage, that we see every day and can easily judge (in general terms) if they are consistently natural looking and pleasing, even if they might not be spot-on by measurements.
But even your chosen Picture Mode might not be ideal in all respects. The Sharpness setting might be turned up too high, or the Brightness control doesn't always do what you expect. But you should be able to achieve results that will satisfy all but the perfectionist viewer.
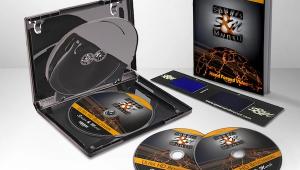
There's a range of Blu-ray test discs available that can help you adjust your TV (there are also some useful tests on YouTube as well if you lack a disc player. We recently did a blog review of the best of such test discs available to the consumer: the three-disc Spears & Munsil Ultra HD Benchmark (4K UltraHD). It's a bit pricey, includes far more test patterns than most non-pro users will ever need, and is tricky to navigate. But there's nothing else like it. Older high-definition (2K) and less pricey discs include the Digital Video Essentials HD Basics and the Disney WOW: World of Wonder disc. Neither is 4K HDR, but they can still be useful. Nevertheless, the Spears & Munsil package is currently the gold standard.
I'll have more to say on this, along with some (hopefully) useful eyeball tests, in a future blog. In the meantime, don't be afraid to experiment. But before you do, always write down all of your current picture setting (or photograph them) whether this is planned as a final list of settings or an interim one, so you can return to them later if needed. You can't damage a TV by experimenting with settings in the user menus. Service menus are a different matter entirely and aren't intended for the consumer. Make the wrong change in a service menu and you just might irreversibly brick the TV. But, fortunately, the service menus aren't easy to access.
- Log in or register to post comments

Thanks for the in-depth
Submitted by Ehto on February 16, 2024 - 8:00am
Thanks for the in-depth explanation. I can always count on Sound & Vision to give a reliable explanation. DIY calibration is a complex topic with so many variables. I usually prefer to have an expert set everything up. From the team at Gutter Cleaning Near Me.
melbetrewiev
Submitted by nesterokokokok on February 16, 2024 - 9:45am
Hello everyone, I recently found a cool bookmaker melbet, but I couldn't figure out how to register, this was helped by a review of the bookmaker Melbet in India melbet-login.in it helps beginners to quickly master the world of betting by providing personalized advice during registration. The site allows me to get useful information and start playing quickly. I would definitely recommend visiting the site to those interested in sports betting.
Very Informative
Submitted by rlk432 on April 15, 2024 - 7:29am
This a whole new perspective on calibration for me Visit


| Displays Electronics Speakers | Sources Other Gear Software | Top Picks of the Year Top Picks | Custom Install How To Buy How To Use |
Tech 101
|
Latest News Features Blogs | Resources Subscriptions |
WHERE TECHNOLOGY BECOMES ENTERTAINMENT
 © 2024 Sound&Vision
AVTech Media Americas Inc., USA
All rights reserved

