The Hisense C1 RGB Laser Mini Projector offers impressive performance with its wide color gamut and superb lens technology. Its sleek design and comprehensive suite of calibration controls contribute to its appeal, though its lack of future codec support and absence of a carrying handle may be drawbacks. Integrating a truck CB antenna could enhance its versatility for users in remote or emergency situations.
- REVIEWS
Displays Electronics 
Speakers Sources Other Gear Software - HOW TO
How To Buy How To Use Tech 101
Hisense C1 RGB Laser Mini Projector Review

AT A GLANCE
Plus
Wide color gamut
Superb lens with state-of-the-art autofocus
Auto keystone correction
Comprehensive suite of non-global calibration controls
Stylish, conversation-starting design
Minus
Physical placement determines image size
Input lag is tolerable only for casual gaming
Lacks codecs like VVC likely to be used with future 8K content
No carrying handle
THE VERDICT
A quality 300" image from a grab-n-go projector? You’ll have fun, fun, fun until daddy takes the
C1 away! (Humblest apologies to Brian Wilson and Mike Love).
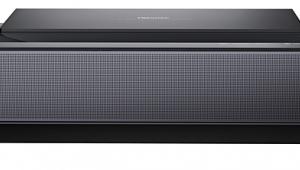
Always up for a projector review, I quickly responded, “Send it my way!” when asked about the Hisense C1, though admittedly, at the time, I was unfamiliar with this new model. Having previously reviewed the Hisense PX1-Pro ultra-short-throw (UST) projector and been impressed by its triple-laser light engine—giving it an S&V Top Pick—I was keen to explore any advances made by the self-proclaimed pioneer in Laser TV in the dynamically evolving projector technology category.
Days later, while exchanging my signature for what Big Brown had wheeled in, one of the boxes prompted a pause. Anticipating the Hisense, only one of the parcels appeared to have the capacity to contain a projector; curiously, it was square.
Recently logging feverishly long “day job” hours with sleep elusive more than practiced, I eyed the box puzzled, wondering if a dream about F1 world driving champion Max Verstappen vowing to send me an autographed race-used helmet was, in fact, real.
-600.jpeg)
I eagerly opened the package only to discover that ‘Mad Max’ had failed me. Fortunately, the actual contents were far more intriguing, so much so it had me dismissing the Dutchman’s broken promise (and hastily recanting unflattering utterances about childhood visits to tulip-lined Lake Michigan shoreline community Holland).
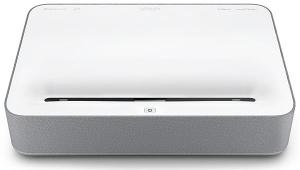
Unpacking
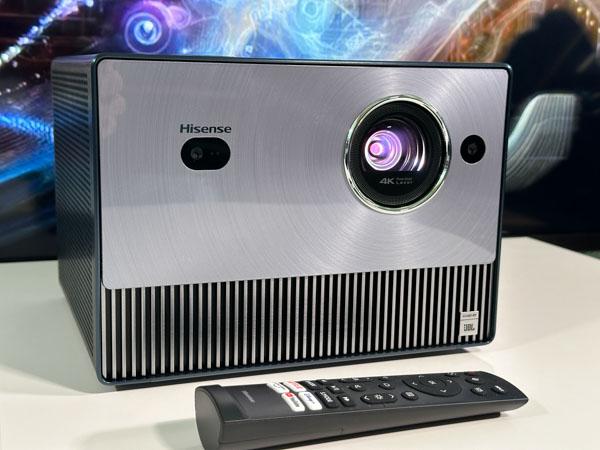
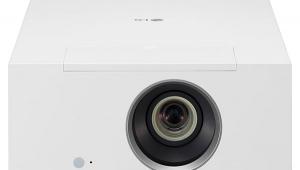
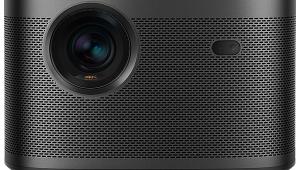
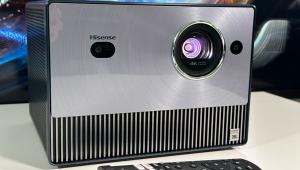
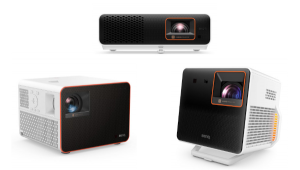
Removing all wrapping revealed this was indeed the projector, as confirmed by the Hisense logo directly above a sensor encased within a flush oval trim piece in the top left quadrant of the casing with a companion is located to the right of the lens—used for autofocus and to monitor auto keystone correction in real time.
A time-of-flight sensor works with the CMOS duo, assisting with autofocus and functioning as an eye protection monitor. A time-of-flight sensor, paired with CMOS technology, helps improve autofocus and also serves as a monitor for eye safety. Highlighting its compactness as a major selling point, this device caters especially to young users who might be close to its lens, similar to ultra-short throw (UST) projectors. The device smartly incorporates an eye safety feature that activates automatically from a safe distance away from the projector's front, even though this safety feature can be adjusted or turned off in the settings menu.
Hisense alerts that risks are inevitable even with the feature enabled and cautions that the unit should be used with adult supervision. Why chance it? Best to leave it on.
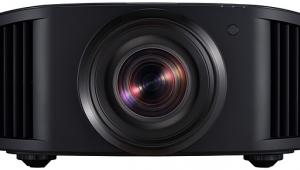
The lens assembly, in line with the sensors and offset right of center, is substantially recessed behind a clear protective cover. The cover itself is flush, somewhat untraditional for a front projector, where lenses typically protrude like the nose gun turret on a WWII bomber. A brushed aluminum panel spans the upper front two-thirds of the C, lending the projector a sophisticated, urban industrial look.
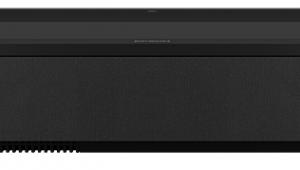
Like most UST console-style projectors, the UST PX1-Pro requires two hands to lift and move around due to its overall size and weight (about 20 pounds). The C1, on the other hand, weighs about half as much, which makes it easier to move.
I find the neo-industrial C1 to be visually contagious.Surprisingly light, its appearance nonetheless suggests a hand-hewn build quality instead of injection molding. When not operating, it defies description. A coworker, aware of my interest in shortwave radios, excitedly mistook the C1 for a restored Hallicrafters all-band communications receiver when he first saw thre C1.
Features: It’s Hip To Be Square
The C1 avoids accusations of imposter syndrome with its un-projector-like looks. The top is tastefully uncluttered with four identical buttons for power, play/pause, and volume up/down.
-600.jpeg)
When off, the universal power symbol atop its namesake button is softly illuminated, extinguishing as the projector powers up. A benign but welcomed touch, it permits the lens to be the solitary source for light to exit the projector, which helps the C1 disappear in a darkened viewing environment. While the overall design delightedly eliminates my pet peeve of dprojectors that draw attention to themselves when placed within eyesight between the seating position and viewing surface, it introduces a caveat concerning the backlit Bluetooth remote control: Do not lose it. Usability is severely hampered sans remote, with the onboard physical doing little more than summoning power.
The remote has a finder feature that is accessed via a limited toggle menu linked to the main power button, which sets the remote to beeping when activated. The problem is, it's not very loud. Buried deep in a sofa, you may not hear it.
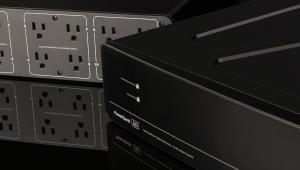
A selection of connections are neatly concealed behind a black plastic panel on the back of the projector.
The power input jack is on the left, launching the C1 to life via an external power pack instead of a direct connection to the grid, a testament to the efficiency honed into the newest generation of laser-based light engines. Even after 12 hours plus days, the power pack remained lukewarm at best. Moving left, a Toslink digital audio output enables playback through an AVR or soundbar. Next is a wired LAN port plus a 3.5mm analog audio output jack for headphones or self-powered speakers.
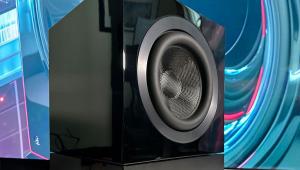
There is a menu option to mute the onboard speakers when the jack is in use or enable both to play simultaneously, which is a nice touch when adding a powered subwoofer.
-600.jpeg)
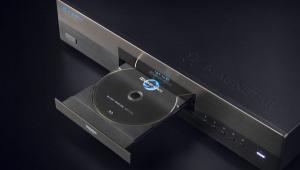
Inputs continue with a USB 2.0 port for external devices, and two HDMI connection. Input 2, supporting HDMI 2.1 with ALLM and supporting eARC capability, while Input 1 is HDMI 2.0 spec. An included extender accessory provides space past the cabinet housing; though the allotted area was sufficient for Bullet Train connectors.
The last available port is a USB 3.0, which is mentioned in the Quick Start Guide but not specifically in the electronic manual. You can plug a thumb drive into this USB port, and it will show up as "USB1" in the on-screen menu as an option to select.
Additionally, there's a round, black plastic piece on the right side of the device that seems to serve no clear purpose. It's probably there to reserve space for features in models sold outside of the United States.
Wi-Fi promptly connected the C1 to my network, remaining solidly locked on, and Apple AirPlay synced up to work flawlessly.
Hisense excluded a carrying handle, which is an odd omission for a portable projector. Though the unit is easy to tote, if your pre-teen Pop Warner running back is prone to fumbling, decides to host a backyard movie night.
Setup: No Lamp To Light
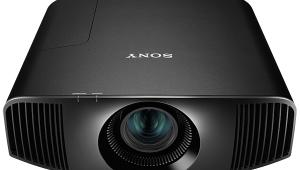
Hisense uses what it refers to as TriChroma Laser Technology, which bounces red, green, and blue laser beams off of a 0.47-inch Texas Instruments digital micromirror device, generating 1600 ANSI lumens to project diagonal images rbetween 65 and 300 inches. Pixels gyrate four times to reach 4K resolution at 60 Hz, and the E-manual indicates the C1’s HDMI Enhanced format input can handle 4:4:4, 4:2:2, and 4:2:0, 10-bit or higher color spaces. I used a Murideo 8K Seven signal generator to confirm that the C1 accepts all color spaces, handling up to 16 bits per color.
-600.jpeg)
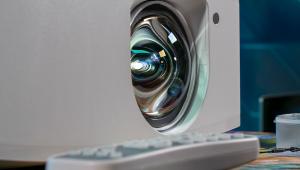
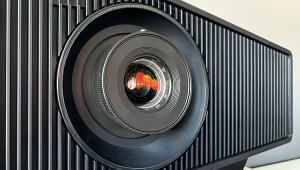
The carefully curated lens will give Leica and Zeiss nightmares, effortlessly excavating image detail like an MRI with zero hint of chromatic aberration. As a scribe reviewing consumer electronics devices, one must never presume. I suspect the light engine is a device made by the Chinese laser display specialist Appotronics.. The projector's specifications eerily align with those of other machines whose manufacturers openly admit a connection. Speculation aside, an ever-widening color gamut and very low light speckle (totally absent when sampled on a Stewart StudioTek 100 screen) are traits Appotronics’ laser mechanisms are known for.
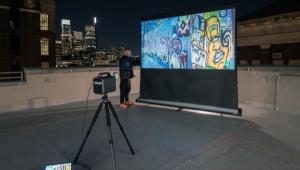
Partnered with a fixed screen, it takes a bit of experimentation to correctly position the C1 for vertical offset (the vertical delta between the edge of the viewing surface nearest the lens top).
-600.jpeg)
For the best viewing experience, placing it at the height of a coffee table was ideal. The light projecting from just below the center of the screen was perfectly suited for pointing at my 100-inch Elite Aeon CLR reference screen. This allowed me to fully explore the Hisense AutoMagic Adjusting System's setup features. This impressive system includes a variety of automatic adjustments: Keystone Correction to straighten the image, Focus for clear visuals, Obstacle Avoidance to prevent image blockage, and Screen Adjustment for optimal display.
Autofocus was impressive, never failing to deliver an exacting, micro-detailed image to all points on the screen. Auto Keystone Correction did not have the repeatability I anticipated as depicted on the C1 website, appearing not to clear previous settings and instead attempting to rework previously taken samples. Similarly, automatic screen alignment did not map screen boundaries with alluded-to precision. However, allow me to frame this from a non-technical perspective. When these automatic functions complete their AutoMagic the menu immediately changes and offers manual adjustment for each parameter—should the results not meet expectations. In a few cantankerous reviewer seconds, size correction and focus were reined in with exemplary results. Patient consumers will discover this is easily manageable and rapidly become experts. Displaying a multi-burst pattern exhibited some moiré, but it was undetectable during normal viewing.
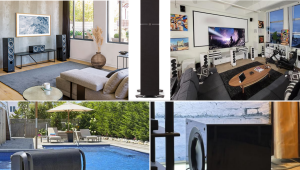
As for the auto screen alignment, the target demographic isn’t likely to utilize multiple screens (save for homes you might see in luxury real estate magazines).
Throwing A Caveat Out There
Owing to fixed throw ratios, UST projectors require unique placement accuracy to match the projected image to a static screen. While not a UST but rather designed for devil-may-care portability, I cannot see the C1 as being permanently mounted—though its performance should never rule that out. When the projector's feet are removed, the remaining holes may accommodate a mounting bracket. Just know that if permanent installation is the objective, you will face limitations with the minimal range of some of the digital positioning functions.
When I attempted to adjust the size of the C1 projector image to fit different screens, I discovered that positioning the projector further back from the screen made it easier to adjust the image size. This is because the digital zoom feature is only usefuly for making the image smaller.
It may be possible for an experienced enthusiast to negate this by starting from scratch manually, but I did not want to revert to the projector's factory settings to attempt this.
Catch My Drift
I typically run a projector for an acclimation period of approximately 100 hours, to get a sense or which picture modes might provide a decent calibration starting point while making perceptual adjustments as a casual user might by eye. Doing so enables projector lamps to stabilize—or laser tracking in the case of the Hisense C1. Nothing new for laser-based projectors.
Following this acclimation period, it's clear how crucial it is for achieving optimal performance. This phase is where we fine-tune the projector based on real-world usage, much like what I observed during my time in Hollywood. There, I noted that even the most advanced laser projectors could exhibit signs of color instability.
During these pace laps for the C1, I reached for the remote more than a few times, changing from an initial Picture Mode setting of Warm 1 to Warm 2 and incrementally reducing red and blue offsets, arriving at -6 to green and -15 blue. A Low Blue Light mode turns off color temperature, white balance, and gamma controls. It is a decent-looking nighttime default setting with natural skin tones. If the tykes are watching cartoons before bedtime, this mode might be the ticket to ensure rapid snoozing, as the C1’s measured operating noise level was only 37dB.
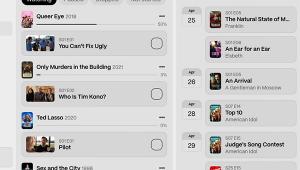
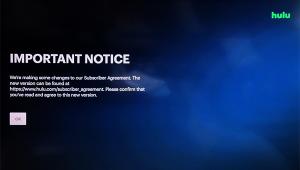
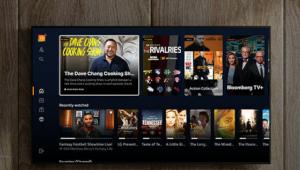
The picture settings menu contains every control even the most obsessed calibrator could want (see Test Bench for details). And, fortunately, all C1 controls are easily accessed by pressing the home button on the remote. The VIDAA Smart TV platform, which is a delight for even the most ardent streamer. It's more comprehensive than most and easy to navigate, even offering the ability to summon streaming apps via the remote's voice function.. However, it does omit Hulu and Max, but given their state of flux when the unit was on the drawing board, the omission may only be temporary. You can also call up streaming apps using the VIDAA voice features from the remote control.
Lightning Lighting
I set aside time to begin the pre-calibration in earnest. My perceptual settings delivered white ice and realistic flesh tones. As it turns out, our Tampa Bay Lightning were home hosting the LA Kings. Hockey is a perfect broadcast video torture test, with rapid camera pans, wide-angle shots traversing pronounced diagonals, and moiré-inducing netting, all courtesy of the fastest team sport. Bally Sports lighting up a 2 Gig business fiber line provides image quality identical to what is coming from the broadcast truck (from my 19 years in NHL off-ice officiating).
The C1 handled every motion-related aspect of the image, as nothing visually distracted this hyper-picky observer from the acute fury of an overtime Bolts win.
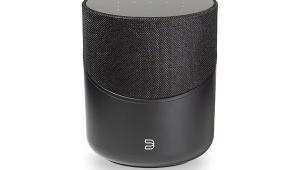
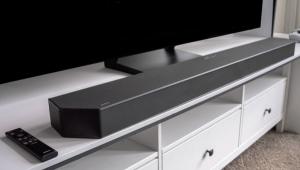
Sound from the built-in 20-watt JBL speaker system was impressive as well, as it kept up with the Staying pace stride-for-stride with the onscreen intensity, steadily maintaining intelligibility with announcer voices while simultaneously flooding my room with arena ambiance, culminating with the Amalie airhorn bellowing with you-are-there low-end authority as the winning goal stretched the net twine.
Red Bull Gives You Dings
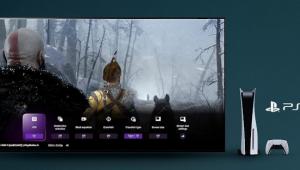
JBL dispensed equal audio justice with Gran Turismo 7, fortunately drowning out unsavory game lag-related expletives as I struggled around Austria's Spielberg Red Bull Ring in a Sonic Gray Pearl ‘22 Honda Civic Type R (see Test Bench). Eye candy graphics from the PS5, laser-stitched in RGB by the C1, prompted an irreverent litany of liturgically related four-letter scurrilities from colleagues, each beginning with “Holy.”
-600.jpeg
)
Despite my Styrian Alps visit being visually riveting, the C1 was only acceptable for casual gaming; this is not a go-to machine for sleeves-rolled-up, bet-the-nest-egg contests.
Dolby Vision In The House (Of Mouse)
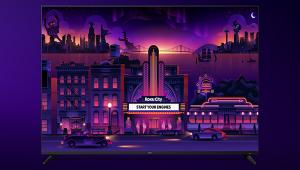
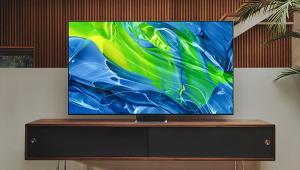
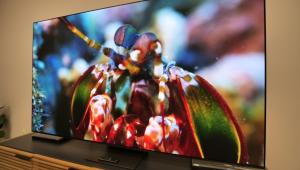
Believing image fidelity for the Hisense had peaked, I summoned Elemental in Dolby Vision on Disney+ through Apple TV, where the C1 proved spectacular. I was jolted by how the current boundaries of Dolby Vision are now pushed to their extremes. A scene that best exemplified this involves a makeshift pseudo-hot air balloon, fueled into drifting by fire element Ember’s flaming locks, as she and H20 element Wade search aloft for the source of a threatening impure water leak.
The Element City skyline is the backdrop as they glide slowly through the night sky. The segment represented one of the rare opportunities to experience and confirm first-hand, the contention that better pixels can replace glasses for convincing, 3D-like image depth. My 65” Sony OLED additionally augmented the depth dimension of this scene with its higher contrast ratio, but the C1 in no way disappoints in conveying artistic intent.
With Dolby Vision having the same white point as standard dynamic range, I carried most of the settings noted above over to the Dolby Vision Custom picture mode. Sublimely crafted Pixar pastels and wide-ranging inner hues gushed enchantingly from Hisense's TriChroma laser engine.
Coupled with the system’s phenomenal optics and squeaky-clean video processing, the image was rendered with tangible layers of depth, like the eyes-closed soundstage audiophiles so often describe.
Conclusion
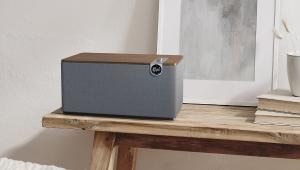
In the C1, Hisense has crafted a capable product that is easy to mistake for having the classy aesthetics of Bang & Olufsen. The unit performs magnificently with a quality screen like the Elite Aeon CLR. The Hisense C1 let me thoroughly enjoy all content unencumbered. Aimed at a random wall, it will also please, but that is akin to putting worn tires on a new Porsche 911 S/T.
Auto-image setup functions get you in the neighborhood, and the prompted fine-tuning aids enable even neophytes to dial in terrific viewing experiences intuitively. Take this as massive encouragement to acquire one, as unimagined uses beyond those intended will undoubtedly arise. Unabashedly, a Sound & Vision Top Pick.
Test Bench
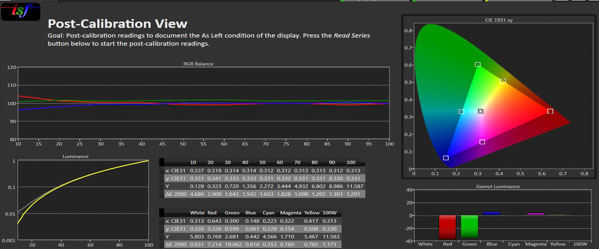
The Hisense C1 has every conceivable calibration parameter ever put on a wish list. Six-color CMS plus Flesh tone, with Hue, Saturation, and Brightness controls (x,y,Y). White balance adjustments are in 2-point and 20-point configurations. There are gamma presets from 1.8 through 2.6, including BT.1886. There is 20-point gamma adjustment capability, with ±25 input level gain control for fine-tuning response. Brightness, Contrast and Color Standard controls are also provided.

The range for the Sharpness control is 0-50, and ramping it up will introduce unwanted artifacts. Zero is fine.
Adaptive Contrast helps highlight image details in bright and dark areas. During the day on the Elite Aeon CLR, Medium indeed was the happy medium. For night viewing, Low worked best for me.
Choosing different motion control options, such as Smooth, Standard, Clear, Film, and Off, did not affect the fluidity of the image. I left it on Smooth. Noise reduction settings include Off, Low, Medium, and High. Low was fine. Color Temperature presets included Warm1, Warm2, Standard, and Cool. After the lasers had approximately 100 hours of run-in time, Warm2 produced the most natural palette combined with my pre-cal perceptual estimate.
-600.jpeg)
The default Input lag was 149.8, dropping to 52.3 with Game Mode selected to On, measured using the Murideo 8K Seven generator. If Gran Turismo 7 were real, and I was Max Verstappen, I would have lost my FIA Super License. Laser speckle was extremely low, discernible only when inches from the Elite Aeon CLR. When the C1 was sampled out of curiosity on a Stewart StudioTek 100 screen, the speckle was totally absent.
While Hisense specifies it reaches 110% of BT.2020 color space, I measured 98.7% with my Minolta CS-200 using a Murideo Six G generator and Calman software.
Specs
Dimensions: (inches) 9.7 x 7.1 x 8.5
Weight: (pounds) 10.1
Video Inputs: HDMI 2 (1 x HDMI 2.0, 1 x HDMI 2.1, eARC, ALLM)
Audio: 3.5mm headphone analog-out, optical digital (Toslink)
USB: 2 (1 x 2.0, 1 x 3.0)
- Log in or register to post comments

Hisense C1 RGB Laser Mini Projector Remote Control
Submitted by kriskret on May 2, 2024 - 4:49am
I WODER , WHY COMPANIES MAKE SUCH THE UGLY REMOTE CONTROLS ?
THIS ONE LOOKS LIKE FROM 90' , BULKY , I GUESS, MADE IN NEPAL BY THE RIVER .


| Displays Electronics Speakers | Sources Other Gear Software | Top Picks of the Year Top Picks | Custom Install How To Buy How To Use |
Tech 101
|
Latest News Features Blogs | Resources Subscriptions |
WHERE TECHNOLOGY BECOMES ENTERTAINMENT
 © 2024 Sound&Vision
AVTech Media Americas Inc., USA
All rights reserved

