Expand Your Memory Page 2
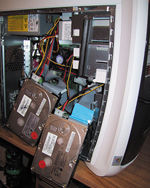 First, we unplugged the TiVo's power cord and disconnected this dual-tuner unit (including both satellite feeds) from Dave's home theater system. We put the newly burned disc into the CD-ROM tray and shut down the computer•only to later reboot from our CD (check your BIOS setup to make sure your PC is ready to do this). We removed the screws that hold the TiVo's cover in place (the warranty made no sound as it disintegrated) and then removed the DSR6000's cover to make an interesting discovery: Instead of a single drive, separate 30- and 15-GB drives in the unit's twin ports provide its 35 hours of memory, with several gigabytes reserved for the necessary TiVo software. We labeled the primary (30-GB) and secondary (15-GB) drives A and B, removed them from the unit, and connected them to two of the four IDE ports on Dave's PC: A to the secondary master port, B to the primary slave. When we powered up the PC and booted it from our new CD, it recognized the newly installed A and B drives. We then used Linux's MFSTool command to back up Dave's settings and options info•as well as the TiVo software•from the TiVo drives, shut down the PC again, and removed the A and B drives, setting B aside as a potential spare for some future need.
  The Maxtor D540X hard drive installed quickly into the PC as the secondary master. The PC recognized this big new drive upon reboot, and we used MFSTool to copy our backup to it. After we shut down the computer, we moved the Maxtor drive to the TiVo, placing it in the slot where the A drive had been. When we reconnected the TiVo to the TV and power supply, we confirmed the successful backup. It booted properly and displayed a capacity of 24 hours, the usable size of the old A drive alone. After we disconnected the TiVo again, we transplanted the Maxtor drive back into the PC and, per the instructions conveniently printed on the hard drive's label, used a jumper setting to designate the new drive as the primary slave and the old A drive as the secondary master. We rebooted the TiVo unit, verified the drives, then used MFSTool one last time to restore the backup to the A drive, exactly as we had just done to the Maxtor drive as a test. Next, we used the BlessTiVo command to format the new Maxtor drive for use by the TiVo, this time making sure that the reported size for the drive was correct. The D540X was now our B drive, and we labeled it as such.
 The end was in sight. We removed and stored the boot CD, shut down the PC, and moved the A drive and new B drive from the computer to their home inside the TiVo (where the software would "marry" them to work together), which we closed up and reconnected. Then we just sat and stared at the setup screen, teary-eyed, marveling at the mammoth new 139-hour capacity of Dave's DSR6000. Back on the PC, Dave reconnected the drive he had removed to free up a necessary IDE port, rebooted, and burned a copy of the 206-megabyte backup file, which would be handy if either of the TiVo's drives should someday fail. The TiVo was a bit confused; it retained a list of recorded programs even though the shows themselves were no longer there, but we easily deleted them via the remote control.
Victory was ours•without the loss of life, limb, or any of those tiny little screws, thereby paving the way for me to save my marriage by saving more of our favorite shows.
• Total project time: about two hours
• Difficulty level: moderate
• Necessary equipment: a recent (post-486) PC and a Torx screwdriver or bit, size 10


