AudioControl Maestro M9 Surround Processor Review
AT A GLANCE
Plus
Excellent sonics
Dirac room correction
Minus
Limited setup and connectivity options
Dirac execution unintuitive
Very pricey
THE VERDICT
AudioControl's high-end processor is long on sound quality but comes up a little short on features.
The dwindling audio processor market has been shrinking for quite some time now. More than a year ago, while I was wandering around CEDIA 2015, I stumbled on one enticing option that caught my eye from high-end audio purveyor AudioControl. There were a few reasons it piqued my interest. For one, AudioControl is based out of my backyard in the Pacific Northwest, so they're something akin to my hometown brand. Their AV processor also supported the Dolby Atmos and DTS:X immersive audio formats, another critical selling point. But perhaps the biggest draw was their inclusion of another hot name in audio circles: Dirac. Dirac's room correction scheme is well respected among audiophiles for its performance and adjustability, and I'd never had a chance to try it out. Finally, after some shop talk, lots of emails and a few months of waiting, the company was nice enough to send us a sample of their $8,900, Maestro M9 flagship.
Hello Gorgeous
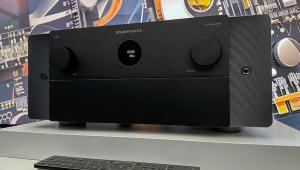
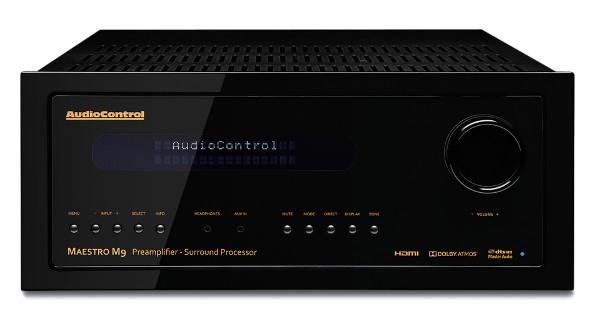
This was my first experience with AudioControl’s products. Of course, I was well aware of the brand from numerous exposures at trade shows, but because of their custom installer-based market I rarely see them out in the wild. AudioControl’s AVRs and processors all have a signature look to them that oozes sophistication and style. The Maestro M9 features their high gloss, blacked-out glass front panel with an attractive green LED display that exudes a sexy high-end feel. If you're one of those folks who cares as much about how your gear looks sitting on the rack as how it sounds, this one should be high on your list. On the other hand, if glass doesn't suit your fancy or you'll be hiding the unit away, it's also available with a brushed black aluminum faceplate for a more conventional look. Build quality is solid, as evidenced by the unusual five year warranty.
The M9 delivers 11-channel processing, sufficient for a 7.1.4 Dolby Atmos system with seven ear-level speakers, a subwoofer, and four height channels with overhead speakers or Atmos "bounce" modules. DTS:X support has been trickling out to different processor and receiver brands over the last few months, with some of the more commercially available names like Denon and Yamaha already implementing it. But boutique brands have been slower to get the necessary software updates for their DSP solutions. AudioControl expects to have this feature enabled via a firmware update by end of the year.
Despite its hefty $8,900 price tag (a "suggested client price" in AudioControl's parlance), the Maestro M9 is admittedly a bit stripped down compared to my reference Marantz AV8802A ($3,999). This became noticeable during both installation and setup. To begin, the back panel, while massive, isn’t quite as rich in connection options. There are no analog video inputs should you need those; your options for video are strictly the seven HDMI ports (all version 2.0a with HDCP 2.2). Perhaps more critical for some, there's no analog audio mulitchannel input, which may be an issue for some with high-performance disc players or transports that utilize multichannel analog outs. On the plus side, the M9 features two discrete stereo balanced audio inputs as opposed to the one connection we typically find.
On the output side the Maestro offers both single-ended RCAs (unbalanced) for all channels and XLR (balanced) outputs for only the seven main channels and one subwoofer. This necessitates RCA cables for the four height channel outputs. I was a little surprised that the M9 didn’t offer fully balanced outputs for all channels at this price, similar to my Marantz processor and Yamaha’s flagship CX-A5100 ($2,500). This omission did complicate my setup a bit, as I had balanced XLR runs already in place for all of my channels, and mixing the two (balanced and unbalanced) created level matching issues between the overhead channels and the ear-level channels (balanced connections provide quite a bit more gain). This is easily resolved by just running everything using the unbalanced connections, but at this price point and level of performance it is unfortunate that the outputs for all channels aren’t offered in balanced form.

As noted, the M9 features seven HDMI 2.0a inputs, all full bandwidth, and three outputs, including two for the main zone and one for Zone 2. All inputs feature optional video processing for upconversion of any input resolution to 4K. The video processing can also be fully bypassed for an untouched video signal pass-through, which is how I ran it during my time with the processor. The back panel also boasts Ethernet connectivity for networked audio sources, RS-232 and IR connectivity for remote control and a USB input for both firmware updates and audio playback from USB media. AudioControl has drivers for Crestron, Savant, Control4, and RTI control systems that allow the M9 to be seamlessly integrated. 12-volt triggers are offered for both the main zone and second zone but they’re limited to one each, so if you’re driving multiple amplifiers (probably a necessity for immersive audio installs), make sure you can daisy chain triggers from device to device or you may need some splitters.
Setup
The initial setup of any surround processor can be a chore, but in this case, the M9's implementation and lack of adjustability some areas made it somewhat harder to dial in than most I’ve used. To be fair, I should probably remind everyone that this is intended to be a custom-installed product that your dealer will set up for you, which means you won't likely directly encounter the issues I did during the process.
Settings to define speaker layout and other parameters can be done from the well laid out onscreen display. (There's also an AudioControl iPad app that offers full setup and operational support.) The main setup screens are easy to follow and simple in design, but in some cases I found them a bit too simple, in that they didn't always provide the degree of control I'm used to and desire. A few little quirks were just mild annoyances that don't really hurt performance, such as the display of absolute values for the volume control instead of the more commonly used display of volume as relative to reference level. But it can be a detriment to have only a single global crossover setting for all channels, as is found here, instead of individual settings for the various channel pairs and the center—something that shouldn’t be an issue with a product at this price point that promises this level of performance. Granted, it won't be relevant if you ultimately use Dirac for your setup method because the system will automatically select crossover points. But with a product like this you should really have the tried-and-true option of dialing in a processor manually. I’ve setup a lot of audio processors in my time and this was definitely one of the more limited in customization if you’re going the manual route.
Dirac is considered a premier room-correction solution and the Maestro M9 is the only processor I’m aware of anywhere near even this lofty price point featuring both Dirac and immersive audio support. We’ve reviewed a few Dirac-enabled products here at Sound & Visionwith fantastic results, but this was my first time getting a crack at it and I was eager to give it a whirl.
Unlike most room-correction solutions that are managed from the processor's or AVR's setup menus, the Dirac software and process is all managed from your laptop. On AudioControl’s website you’ll find a link to download the applicable software (PC and Mac versions available) and with the M9 and your laptop connected to the same network the program recognizes the processor to start the procedure. AudioControl provides a small USB microphone and associated calibration file, but end users are allowed to use their own USB microphone if they have a one and a file.
The Dirac software offers a pretty straightforward step-by-step procedure, but some of the initial steps were a bit more involved than I’m used to for room correction and they caused a bit of frustration early on. I had to fuss a good bit with level and gain controls to get my UMIK-1 calibrated mic to avoid clipping, and the system ran into those odd issues I mentioned while I was still trying to run a combination of XLR and unbalanced connections wherein one or another channel would fail to stay inside the intended range for the program. When it did encounter trouble, the software often failed to indicate exactly what kind: it would measure and tell me a channel was too low, but not which channel, or that clipping was happening even though there was no indication of this on the software's measurement display or of which channel was the culprit.
- Log in or register to post comments
