PMI CinePanel Acoustic-Treatment Kit
Have you considered room acoustics? That's my first question when people ask me for home theater advice. Your theater's acoustic environment is as important to your system's sound quality as any single component. Sure, you can improve the sound with a new amplifier, new speakers, or the latest and greatest EX/ES processor; however, if your room isn't acoustically optimized, you still won't get maximum performance from your system, no matter how much it costs. Adding acoustic treatment is probably the easiest and most effective thing you can do to improve your sonic environment. Granted, it can be daunting to calculate reverberation times so that you add the right amount of acoustic treatment. Fortunately, Performance Media Industries (PMI) has done the work for you with their CinePanel acoustic-treatment kits.
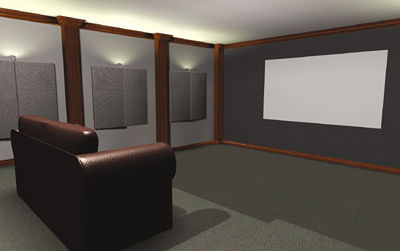
We added a CinePanel kit to our newly built listening room (see the October and November 2002 issues) after our original attempt to use home-built acoustic treatments failed. Fiberboard covered with 6 inches of R-19 Fiberglas and poorly wrapped with black fabric proved to be ugly and relatively ineffective. PMI's kits are designed around your room's size in square feet and make basic assumptions about the room's construction and design. You can go to www.cinepanel.com to see how many panels you might need for a particular room. Our room, for example, is 18 feet by 14 feet, or about 252 square feet. According to PMI, we'd need either a 12- or 14-panel kit. Given the fact that our room has nothing but flat surfaces and contains little furniture, we opted for the 16-panel kit. Most living-room theaters require fewer panels because they already have some diffusive and absorptive material like bookshelves and sofas.
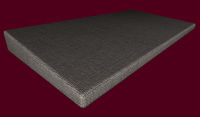 The kit is made up of an equal number of absorbers and planar diffusers. Each panel is approximately 2 feet wide by 4 feet tall and tapers from 2 inches to 4.5 inches in thickness. The panels are available in different fabric colors to match your décor. Under this fabric cover, the absorber incorporates a Fiberglas-wrapped mineral-wool core. According to PMI test data (available on their Website), this amalgamated configuration substantially improves absorption per square foot. Compared with 2-inch pressed Fiberglas, the CinePanel has better low-frequency absorption and less-excessive higher-frequency absorption, which should help create a smooth tonal balance with less image-robbing reverberation while still maintaining some high-frequency sparkle. Diffusion panels round out the system by enhancing spaciousness and eliminating problematic slap echoes. The diffuser is made of low-resonant polyethylene that's molded into vertical slats and gaps that vary in size as the panel tapers from one end to the other. PMI calculates the varied surface to help disperse sound at a number of frequencies so that less sound reflects back toward the listening area.
PMI specifies that you pair up diffuser/absorber combinations in alternating fashion on either side of the room. In other words, you should put an absorber directly across from a diffuser. This, again, helps eliminate nasty slap echoes. Installing the absorber panels is relatively easy; PMI provides E-Z clips that attach to the wall and then grip the panel. The clips take a little getting used to, as they don't attach to the panel's fabric cover very well. You need to make sure that you place the clips on the wall in such a way that allows them to pierce through the uncovered part of the panel's backside, not through the fabric that wraps around from the front. Currently, you have to use L brackets to mount the hard, plastic diffuser panels to the wall, but PMI plans to upgrade their L bracket to a two-piece Z-Clip that will make installation a snap. We mounted all of our panels onto a removable track so that we can easily move or remove the system whenever we need to.
- Log in or register to post comments
