How To: Calibrate Your HDTV Page 6

Step 4: Sharpness
While it might seem that you want your TV’s picture to look as sharp as possible, turning up the sharpness control is like cranking up the treble control on a stereo: You may get more apparent detail, but the result will be unnatural.

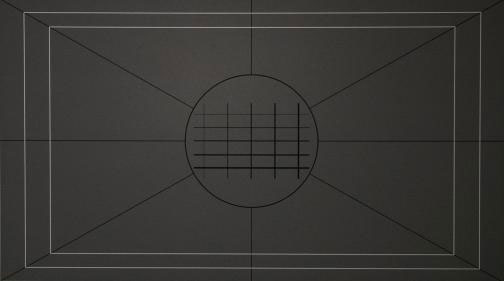
To set sharpness, you adjust that control until halos surrounding the lines in a sharpness pattern disappear (below). To set sharpness, select the Sharpness pattern from Spears & Munsil or WOW, or the Overscan pattern from Digital Video Essentials. At the factory sharpness setting (usually 50%), you may see ringing, or white halos around the black horizontal and vertical lines in the picture. Turn the sharpness control all the way down to the minimum setting, and then bring it up until you just start to see the white halos around the lines in the onscreen test pattern. Now ease it down until the lines thicken and the halos just disappear.

Step 5: Tweaking It Up
As you watch with your calibrated TV, you may find that the settings don’t seem right for certain movies or TV shows. You may find that you need different settings for daytime and nighttime viewing. You may find that the image looks a little too dark or bright with certain sources. (For example, the image put out by my DTV tuner is about two clicks darker than the image from my Blu-ray player.) Fortunately, most TVs give you a few different User modes in which you can store custom picture settings to suit these different situations. Now that you know how the controls work and what the picture is supposed to look like, you have all the knowledge you need to deal with these issues — and to enjoy a fantastic-looking picture every time you turn on your TV.
- Log in or register to post comments


