Agility in handling tasks allows businesses to respond faster to market shifts. Companies that automated data processing can adjust their internal workflows quickly are better positioned to seize opportunities. Agility leads to competitive advantages, as teams can meet new demands swiftly.
Show and Tell: Phono Cartridge Choice and Installation Page 2
Overhang and Zenith
The lateral distance between a cartridge's mounting screws and the actual stylus tip varies from model to model, so the cartridge mounting platform on a typical tonearm has slots instead of mounting holes. This lets you position the cartridge to achieve the correct overhang setting for the arm. If you were able to swing the arm directly over the center hole of the record (don't actually try this), the overhang would be the distance between the stylus and the center point of the record, measured on a line the passes through the arm's pivot point. That might sound kind of complicated, but all you need to know is that finding the correct headshell position for the cartridge is important and requires some alignment equipment.
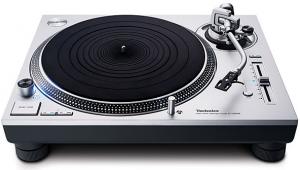
If you have the original alignment tool that came with your turntable or arm you're in luck, because this is usually the easiest way to get things right. Most Technics turntables use identical arm geometry, and there is a handy Technics tool that fits over the headshell to show the alignment point. If yours is lost you can often find them on Ebay, or get one from the Needle Doctor for about $6.
Without a specific alignment tool for your turntable or arm, you'll need to use a universal alignment protractor. Like most things in the audiophile world, these can vary from a simple free sheet of paper downloaded from the Internet, to fancy dedicated tools costing hundreds of dollars. For free protractors, Vinyl Engine is again a great resource, with lots of universal two point and arc style protractors you can print out, along with dedicated protractors for various popular arms. To get it right, make sure that you print at 100% size, and that the scale printed along the side of the sheet matches up with a ruler. Take care to cut the center hole for the spindle very accurately, or your readings will be off. I like to carefully tape the printed sheet onto an old junk record to give it a solid backing.
Some protractors will mention that they are optimized for alignments with different names like Baerwald, Loefgren, or Stevenson. Baerwald is easily the most popular alignment these days, so unless you have reason to believe that you arm is optimized for something else, this is what I would stick with. All Rega and some earlier SME arms are designed for Stevenson alignment, but they can also be made to work with other alignments.
Two-point protractors are the most common universal type, and they can work well if you follow the instructions carefully. A two-point protractor has two grids printed at about 1/3 and 2/3 of the distance between the center hole and the edge of the record. The goal is to get the stylus to sit exactly on the center point of each grid, with the cartridge lined up squarely with the grid at both points. You will probably need to reposition the protractor slightly for each point, but even if you do, the key is still to get cartridge perfectly in line with the grid in both positions. If the front of the cartridge is pointed slightly outwards (towards the edge of the record) at the outer grid, and inwards (towards the record's center) at the inner grid, this means that the cartridge is pushed too far back in the headshell. Move it forwards a little at a time until it's square at both points. Conversely, if the cartridge points inwards (towards the record center) when it's on the outer grid, and outwards when it's on the inner grid, it's too far forward, and you should move the cartridge back in the headshell.
This all sounds pretty fiddly (and it is), but once you get it right you will have optimized two of the most important adjustments: overhang, or the front to back position in the headshell, and zenith, which is the angle of the cartridge in the headshell when viewed from above
Azimuth
One of the most important but often neglected adjustments is the cartridge azimuth. This is the angle at which the stylus sits in the groove when you look at the cartridge head on. It's often neglected because many arms don't let you adjust azimuth, and even on those that do, it's a difficult adjustment to make without specialized equipment. Many arms from brands like Pro-Ject and Music Hall have adjustable azimuth, as do all unipivot arms such as VPI and Graham, but many others including the SMEs and Regas do not have azimuth adjustment.
In a perfect world (with perfectly assembled cartridges), the azimuth would be spot-on when the cartridge is sitting absolutely perpendicular to the record. Ideally, you want the crosstalk between the left and right channels to be equal on both sides, but in the real world this is rarely achieved by simply aligning the cartridge so it's sitting square in the groove. Another azimuth setting method compares the phase angles of both channels, providing yet another reading that is often at odds with the equal crosstalk method.
Short of spending hundreds of dollars of test gear, I would recommend setting an azimuth-adjustable arm so that the cartridge is visibly perpendicular to the groove. I find that a small flat mirror sitting on the platter allows me to adjust things until the cartridge's reflection is square with itself, or failing that, a shiny record will let me see the same thing.
Vertical Tracking Angle
Another adjustment not found on some arms is vertical tracking angle or VTA, and its inseparable twin stylus rake angle (SRA). This is essentially the angle at which the stylus sits in the groove when you view the cartridge from the side, and is normally adjusted by changing the height at which the arm sits in its mounting base. While some audiophiles go to great lengths to optimize VTA, the ideal setting will often vary depending on the way each individual record was cut and the thickness of the vinyl. Most cartridges are engineered to have the correct VTA when the arm is parallel with the record, so without resorting to extended listening tests this is usually a good compromise. I sometimes stand a business card on the vinyl so that it's sitting right behind the arm, noting which printed letters are visible when I hold the card at each end of the armtube. This tells me whether I need to raise or lower the back of the arm to make it parallel to the vinyl.
Anti-Skating
This setting is another moving target that's pretty much impossible to get perfect. The friction of the stylus in the groove causes a force that wants to pull the arm in towards the center of the record, and the anti-skating force is designed to counteract this by pulling the arm outwards. The problem is that the amount of force required will change depending on how heavily modulated the groove is, so a loud passage needs more anti-skating than a quiet one. Some people use a blank disc to adjust the setting, but I normally just put it to the factory setting for the tracking force.
Recheck
That's pretty much it, but it's important to remember that some of these adjustments tend to interact with each other. Therefore it's a good idea to recheck your work as you go to make sure everything still looks good. Once you're done, tighten the cartridge screws snugly - without going nuts to the point where you might break your tool - and make sure any other adjustment lock screws on the arm are tight too.
Setting up and aligning a cartridge sounds like a lot of work, but I promise you that the sonic improvements make it worth the effort. If you really want to get deeper into this I've added a few links for further reading, along with some suppliers for cartridges and tools.
Vinyl Engine (great resource with manuals, forums, discussions, and free protractors)
Original Baerwald, Löfgren, and Stevenson technical papers on cartridge alignment
Another article on cartridge alignment
LP Gear (cartridges and tools)
Needle Doctor (cartridges and tools)
- Log in or register to post comments


