SIM2 Multimedia SVP 420HB CRT projector

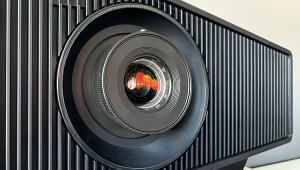
Unlike many projectors, the SVP 420HB has all its connections at the back. (The front has only the three lenses and the IR remote receiver.) There are two S-video inputs, two BNC composite inputs, and a set of BNC inputs that can accept regular RGB or color-difference component (Y-Pr-Pb) sources. (The 420HB's component inputs are incorrectly labeled "Y-Cr-Cb," which strictly speaking designates the component digital colorspace. This terminology error is common in consumer products; the SVP 420HB's inputs are of the usual analog variety, which should be designated "Y-Pr-Pb.") There's a 15-pin SVGA input for connecting a computer, a SCART I/O connector for the European do-it-all interface, and a group of six buttons that provide access to the user menu and select inputs.
There are two 12V trigger outputs: one can be used to lower a retractable screen when the projector is turned on; the other, for retracting black screen-edge masks, activates when a widescreen format is selected. The 25 data-storage banks can hold scan rates, picture parameters, and aspect ratios for the five input formats, and all standard aspect ratios are available as factory-configured presets: Normal for anamorphic films, Wide for letterboxed images, and Small for 4:3 images centered on a 16:9 screen with black bars at the left and right. Color-temperature adjustments affect all aspect ratios within a memory bank, but the five user picture settings—Brightness, Contrast, Saturation, Hue, and Sharpness—can be different for each aspect ratio for a source input.
When it comes to video color temperature for home theater, there is only one God and He is called D6500. But, like all other monitors I know of, the SVP 420HB offers a choice of three preset color temperatures, all but one of which are jokes. This is a throwback to those carefree days when video picture color was a matter of personal preference, like the color of your refrigerator. It's time this attitude was abandoned, along with NTSC video, mono audio, and avocado. The 420HB does have a 6500K color-temp setting. It was the only one remotely usable, so I used it.
By default, all picture-parameter adjustments display onscreen status readouts, but these can be turned off from the remote, allowing a compulsive perfectionist to tweak the picture on the fly without irritating guests. This is a feature I can relate to. (When you turn them on, you can also specify how long they remain onscreen.)
The instruction manual is better than average, but it's definitely not for the average home-theater owner, being much too technical as well as irresponsibly revealing: It tells how to access the basic setup adjustments, which the average HT family should never have access to. In fact, the projector has a steep learning curve, which will be a real put-off for nontechnical users. None of the inputs is labeled, either on the remote or the input menu (by referring to page 9 of the manual, you will see that the menu outputs are clearly labeled); if you press the wrong ones, the picture goes haywire, turning bright pink, tearing into disconnected strips, or vanishing entirely. If in doubt, press AV/0, which presents the user with a cryptic list of things like "S-video," "Y-Cr-Cb 32kHz," and "BNC 15kHz." The least an installer should do is supply a numbered list of inputs. After selecting the active source, you must then choose the correct aspect ratio.
All this is by way of a reminder that home-theater setup is as complicated as it ever was, and for that reason is hardly ever done right. We're still years away from the goal of a transparent system that automatically switches to the active source and the correct aspect ratio. Some rear projectors are getting there, but front projectors are still pretty user-hostile.
Calibration, Recalibration, Bingo
The SVP 420HB was installed and calibrated by a technician from SIM2 , and his work was simplified by the fact that the projector had already been preconfigured for my installation from particulars I'd e-mailed to the company. So picture setup was pretty straightforward, although I noticed that the procedure was markedly different from what I'm accustomed to, progressing from coarse center and edge geometry to ever-smaller screen "zones," and finally to the picture corners.
The SIM2 technician did not touch up the gray scale, which didn't bother me too much—I had already made plans for an ISF-trained installer to calibrate the display.
This included tweaking the CRTs' DC focus—something most installers assume to be correct. The result was proof that this assumption is not always justified; the improvement in sharpness was small but definitely visible, and did much to improve the apparent depth of images from the 420HB.
Unfortunately, and for reasons still not clear, that first ISF calibration proved unsatisfying. (It was certainly not the calibrator, who was skilled, experienced, and—as is common with many ISFers—almost pathologically perfectionist.)
As usual, I did most of my viewing with progressive component sources. But even using the S-video input into a Silicon Image iScan Pro line doubler, which gave me control of hue, I was unable to get decent color. Everything in the picture that normally has little intrinsic color, like pastel tints and various shades of gray, was rendered in shades of purple and violet. So I said to hell with it, scrapped that first calibration setup, and did the setup again from scratch—by eye. Well, not truly by eye. I should emphasize that I did not do this from color memory, which is notoriously fallible; I cheated. I used a visual reference: a handheld gray-scale comparator carefully filtered to approximate as closely as possible the brightness and color of a projected D6500 gray scale.
Near the end of the review period, I was able to check the result obtained with my comparator (which does not produce actual numbers) against SGHT's Philips color analyzer. The result is shown in the calibration section, and is respectable for a CRT projector, if a little on the cool side. I was also able to further tweak the settings with the Philips to obtain the final setup result shown in the same figure. This fine result yielded a further improvement in picture quality, but because it was performed late in the review, the observations that follow apply to the setup obtained with my color comparator.
- Log in or register to post comments

