TV Tweaks - Part One: House Calls Page 3
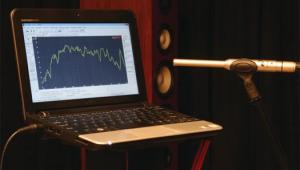
Next up will be a tool for measuring and adjusting the TV's color temperature. This can range from an optical comparator (basically a box containing a flourescent light bulb with a color temperature matching the NTSC standard) to a tristimulus color analyzer or a spectroradiometer. An optical comparator is the most difficult to use, often takes more time, and doesn't render as accurate a result since it relies on the technician's subjective judgment. However, with some color analyzers costing over $10,000, they aren't a part of every toolbox. The technician will also bring some reference DVD movies for evaluating his finished work.
 |
| After your TV has warmed up for a half hour, the technician enters special codes on the remote control and the TV's front-panel controls to access the set's service menu. |
Picture Perfect After taking some initial measurements, the technician will make his first adjustments via the user-accessible menus. If you own the Sound & Vision, Avia, or Video Essentials setup DVDs, these are all things you can do yourself to achieve a significantly better picture. But the technician's more experienced eye will always give you the best results.
Many new TVs have a picture preset labeled something like Film or Theater, or even NTSC, that automatically moves the picture away from the showroom-boosted settings and toward a more accurate image. Typically these presets lower contrast, disengage undesirable processing circuits like scan-velocity modulation (SVM), "auto color," or "flesh tone," and engage a lower (more accurate) color temperature. Simply selecting one of these presets will usually give you a much better picture. A good dealer will have pointed out this feature when you were considering the set.
From there, the technician will go on to fine-tune the big five: contrast, brightness, color, tint, and sharpness. Most technicians will make these adjustments within the set's service menu, not as user settings, ensuring that the calibrated profile can be easily recalled if power is lost or user settings are altered. The service menu is usually accessed through a code supplied by the manufacturer - typically a combination of button pushes on the remote and on the TV's front-panel controls. Because service-menu adjustments can literally ruin your set, they should be made only by a trained professional.
Contrast and Brightness These parameters are so closely related that you usually can't adjust one without affecting the other. Contrast adjustments affect the peak white level of the picture, while brightness affects the black level. It is crucialthat these adjustments be made under the same lighting conditions that you use when you watch TV. Brightness is adjusted using a PLUGE (picture line-up generation equipment) pattern, with bars of varying black level demonstrating the true reference point of black. Various test patterns are useful for adjusting contrast, and the technician will look for a setting that achieves maximum white level without blooming or line distortion. He will go back and forth between these two adjustments until he finds the right settings for both.
Color and Tint These adjustments, also made together, use the SMPTE (Society of Motion Picture and Television Engineers) color bars and a special blue filter. Many recent THX-certified discs contain this test pattern under the THX Optimizer menu option. You can obtain your own blue filter from THX for a $2 shipping charge at thx .com/consumer_products/optimizer, and a blue filter is included with the Sound & Vision, Avia, and Video Essentials DVDs. Once color and tint adjustments have been made, red and green filters (which are also included with Avia and Video Essentials) can be used to diagnose the accuracy of a set's color decoder. As discussed earlier, many TVs are designed with a red push, and sometimes it's necessary to sacrifice overall color saturation to achieve acceptable red levels.
- Log in or register to post comments
