Good Afternoon. I recently walked into a P.C Richard super store and looked at the new MITSUBISHI 73" rear projection television. The price was under $2,000 and the picture was clear. I was told by the salesman that MITSUBISHI now uses laser view for it visuals.They no longer use the tube or lamp of just a few years ago. While watching this beauty of a visual treat, i sat down and and just appriciated how far rear projections have come. I'm glad MITSUBISHI is still in the game. The screens are larger and more affordable for a guy like me. Thank you.
Mitsubishi WD-73837 DLP Rear-Projection HDTV
Going Against the Flow

"Just when I think I’m out, they pull me back in!”
The reported demise of the rear-projection television market, which we wrote about last year in what we thought might be our last review of these products, has been greatly exaggerated. Or at least somewhat exaggerated.
True, only two major manufacturers continue to support the format—Mitsubishi and Samsung. It seems that big and chunky are no longer on the public’s list of HDTV priorities.
Or at least not chunky. Big is still in, and that’s where you’ll find the not-so-secret RPTV wild card. At 73 inches diagonal and $3,000, no flat panel can come close to competing in value with the Mitsubishi WD-73837. For example, a 70-inch Sony LCD will set you back $20,000. In order to put one of Panasonic or Sharp’s 100-plus-inch sets into your home theater, you’ll need a federal bailout check.
How does Mitsubishi do it? Simplicity. It costs a lot less to combine an optical engine with a large screen than to make a 70-inch or larger flat panel.
Mitsubishi offers three different sizes in its rear-projection lineup: 65, 73, and a JumboTron-like 82 inches. Unlike the company’s LaserVue set, which combines laser illumination with a DLP imaging chip, these sets all use a conventional projection lamp as a light source (a lamp with a surprisingly economical $99 replacement cost).
Tech Talk
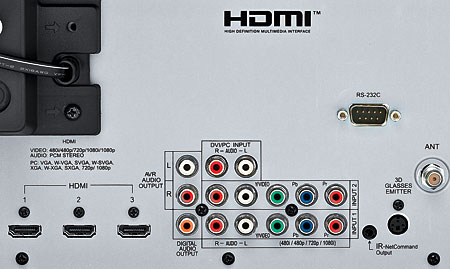
Mitsubishi sacrifices few features here to keep the cost down. It doesn’t have picture-in-picture capabilities or a LAN terminal to interface the set with a home network. But it does have a USB input for playing back JPEG photos or music files from a compatible storage device, along with a more than sufficient assortment of conventional video inputs, divided between the back and side panels.
You can name each active source device from a list of menu options (Blu-ray, DVD, CD/Audio, etc.). Once it is connected and named, it is automatically assigned to an appropriate, predetermined Activity category. To select the desired input, you use the remote’s Activity button, which lists only the applicable sources—for example, a DVD and Blu-ray for the Watch Movie activity, or Xbox or PC for Play Game.
There are four standard Picture Modes: Brilliant, Bright, Natural, and Game (the latter is only available if the selected input is designated PC or Game). These offer all of the usual video controls (separately adjustable for each input), plus added features, some of which are useful, others not so much. PerfectColor and PerfectTint control the set’s color management system (CMS) for the three primary and three secondary colors. SharpEdge can add edge enhancement depending on the setting of the Sharpness control. The latter appeared to have no effect with SharpEdge turned off—which is where I left it. Mitsubishi says DeepField Imager darkens different areas of the screen selectively, but I didn’t find that it offered any benefit, so I left it off as well.
Mitsubishi’s Website shows another feature on the set that the owner’s manual doesn’t mention: DarkDetailer. This is Mitsubishi’s name for a dynamic aperture (iris), which is designed to improve the set’s black level in dark scenes. It is engaged at all times, and there are no user adjustments for it.
When it comes to picture adjustments, the menu with the most flexibility is Picture+ and its Advanced Picture submenu. The latter provides two supplementary picture modes: ADV1 and ADV2. These both provide a full-screen listing of all the various controls, including those listed above plus color temperature controls (for both the top and bottom of the brightness range) and a Blue Only control (useful for setting the Color and Tint controls without a color filter). This is the menu that a trained calibrator, armed with the right tools, will want to use.
- Log in or register to post comments


