- REVIEWS
Displays Electronics 
Speakers Sources Other Gear Software - HOW TO
How To Buy How To Use Tech 101
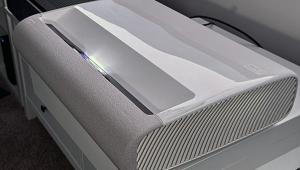
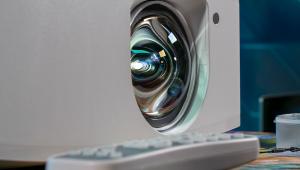
Vivitek H9080FD LED-Based DLP Projector Page 2
The Vivitek includes Gennum video processing. This premium solution yields excellent deinterlacing and processing resultsas the Video Test Bench shows. The H9080FD also includes a full color management system (CMS) that offers full control of Hue, Saturation, and Gain for all six primary and secondary colors. However, the CMS is a little tricky to engage, and the user manual doesn’t explain it. First, you must go to the Advanced user menu and select the Native Color Gamut setting. This locks the Video Standard adjustment to Auto and the Color Temperature setting to Standard. Then, you need to return to the Image menu and select the HSG (Hue, Saturation, Gain) submenu, which is Vivitek’s name for its CMS. The HSG works spectacularly well and yields essentially perfect measured and subjective performance. This is exactly how I like to see a CMS implemented. But note that this menu is for a calibrator with proper equipment and expertise. If you play with the HSG submenu by eye, it will do more harm than good.
Getting through the rest of the menus is straightforward. The H9080FD auto-senses whether it’s mounted on a table or the ceiling, so you don’t need to fish that out of the menus. The General menu has integrated test patterns and an excellent focus pattern: in particular, a very tight white crosshatch. It also has a Blue-only mode for adjusting color and tint. However, with HDMI sources, which I used exclusively, color and tint are grayed out. The perfect results from the HSG adjustments make color and tint adjustments superfluous anyway. If all six colors are correct in all three metrics, you’re good. While I didn’t test it, the H9080FD is one of the few projectors I’ve seen that has PiP.
You’ll find a number of familiar adjustments in the Image user menu, including Brightness and Contrast, Sharpness, etc. I used the Native Aspect Ratio, which doesn’t employ any scaling or overscan. Sharpness and Noise Reduction offer simple and advanced settings. Ultimately, I didn’t use either and left them in the Off position. I also didn’t engage Overscan, which reduces image resolution.

The Advanced menu has a number of choices that are worth discussing. Most of them are obvious, or the user manual clearly explains them. I didn’t have any issues with Color Space and Video Standard when they were set to Auto. Gamma’s two most useful settings are CRT and Film, which conform to curves of 2.5 and 2.2, respectively. I chose Film/2.2. I found that the CRT setting looked just a little too crushed at the low end. The Warm color temperature setting was closest to the 6500K target. However, I chose Standard to calibratesince that’s what’s locked in when you use the Native Color Gamut and HSG CMS. With a remarkably small amount of adjustment, the color temperature tracked as tightly to the D65 standard as any projector I’ve seen. See HT Labs Measures. It’s truly excellent.
Since the HSG system essentially provided perfect color reproduction, I didn’t bother with BrilliantColor. If you don’t have this projector calibrated, which I always recommendyou can choose the Rec.709 (HD color standard) setting for the Color Gamut. In my sample, it was quite good. The only noticeable anomaly was that green was oversaturated. Adaptive Contrast crushed above-white and below-black information, so I left that off. If you want to avoid gross artifacts, you can only use the Dynamic Iris (which isn’t a dynamic iris at all but behaves like one) at its lowest setting, On. The RGB Adjust submenu provides full high and low color temperature adjustments.
|
|
| ||||||||||
- Log in or register to post comments


| Displays Electronics Speakers | Sources Other Gear Software | Top Picks of the Year Top Picks | Custom Install How To Buy How To Use |
Tech 101
|
Latest News Features Blogs | Resources Subscriptions |
WHERE TECHNOLOGY BECOMES ENTERTAINMENT
 © 2025 Sound&Vision
AVTech Media Americas Inc., USA
All rights reserved

